InVideo AI Review: My Honest Thoughts After 1 Year of Use

In 2024, whenever I searched for the best AI video generators, I noticed that InVideo AI would often pop up on the list. That was genuinely interesting. After seeing it so many times, I decided to try its free version, and it was pretty decent.
I eventually got the paid version and have been using it for almost a year now. Many of the videos on my YouTube channel are now created with InVideo AI. I even use it to create ads for Facebook and TikTok.
But just because I use it doesn’t mean it’s all sunshine and rainbows. It comes with its fair share of issues and limitations, some technical and some related to subscriptions.
That’s why I also got lifetime access to another AI tool, VideoExpress AI, with a one-time payment.
Anyhow, in this post, I will break down every single detail about InVideo AI, so you get all the insights you need before you decide to buy a paid plan.
The people who are mastering AI tools right now are taking over the internet. You see them across YouTube, Instagram, TikTok, and any other platform you can think of. In this post, I'm going to show you exactly how you can become one of them.
I've been testing InVideo AI for the past 90 days, using it for everything from faceless channels and brand ads to long-form content. When you know how to use it properly, it's one of the most powerful tools out there.
The problem is that most people never learn how. They waste time, burn through their credits, and end up back at square one, still editing videos manually.
So, I’m here to show you exactly how to turn a single prompt into a fully edited, voiced, and upload-ready video in under 20 minutes. You’ll learn how to use simple text commands to replace traditional editing and how to use AI to produce up to 10 minutes of content with just one prompt. Let's get into it.
What Makes InVideo AI Different?
Most video tools still rely on timelines, manual editing, and clunky interfaces. What makes InVideo AI different is its ability to scale. Other tools like Syllaby, Kling AI, or Runway give you short clips or isolated visuals.
But, InVideo lets you generate full-length 5 to 10-minute videos with a single prompt. This includes everything: the script, voice, scenes, pacing, and music. You're not just piecing assets together; you're creating a complete, ready-to-publish video in one go.
One prompt gives you a fully written and edited video, all done in a single pass. And the best part? You can control everything with follow-up prompts. This means you can finally stop putting off making videos because you don't have time and start being consistent.
I know the main fear is whether the video will look clean enough to post or if it will look like one of those cheesy AI videos. That’s why I’m showing you exactly how to use it live, so you can see what to do and what to avoid before you waste a single credit.
How to Use InVideo AI: A Step-by-Step Guide
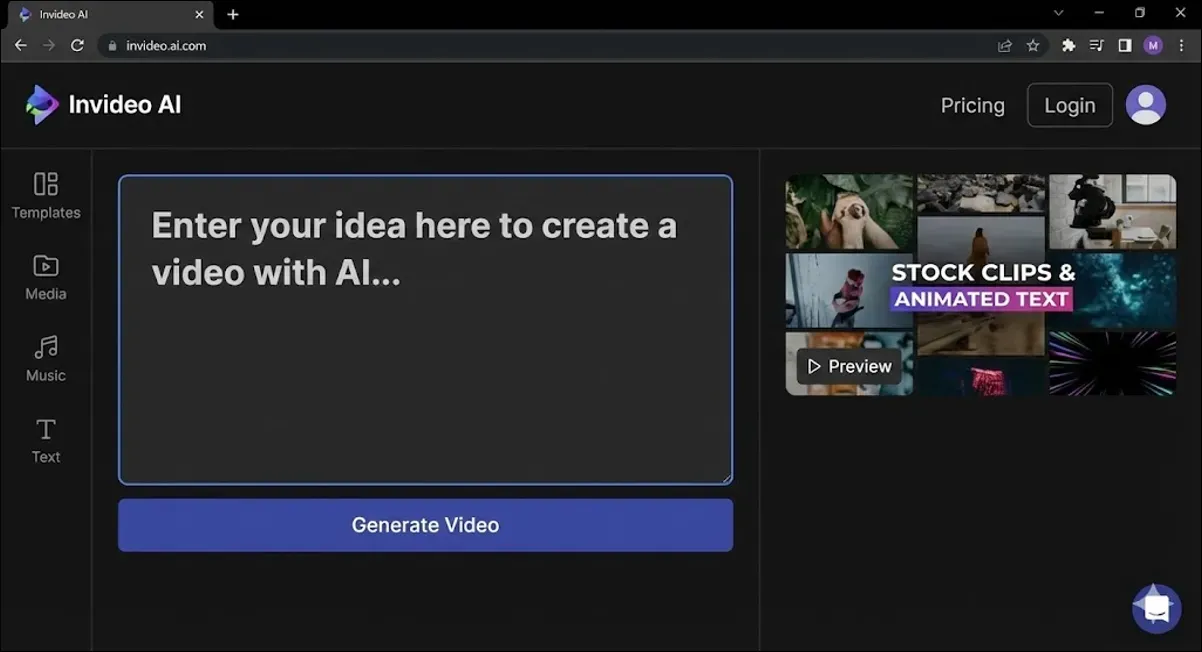
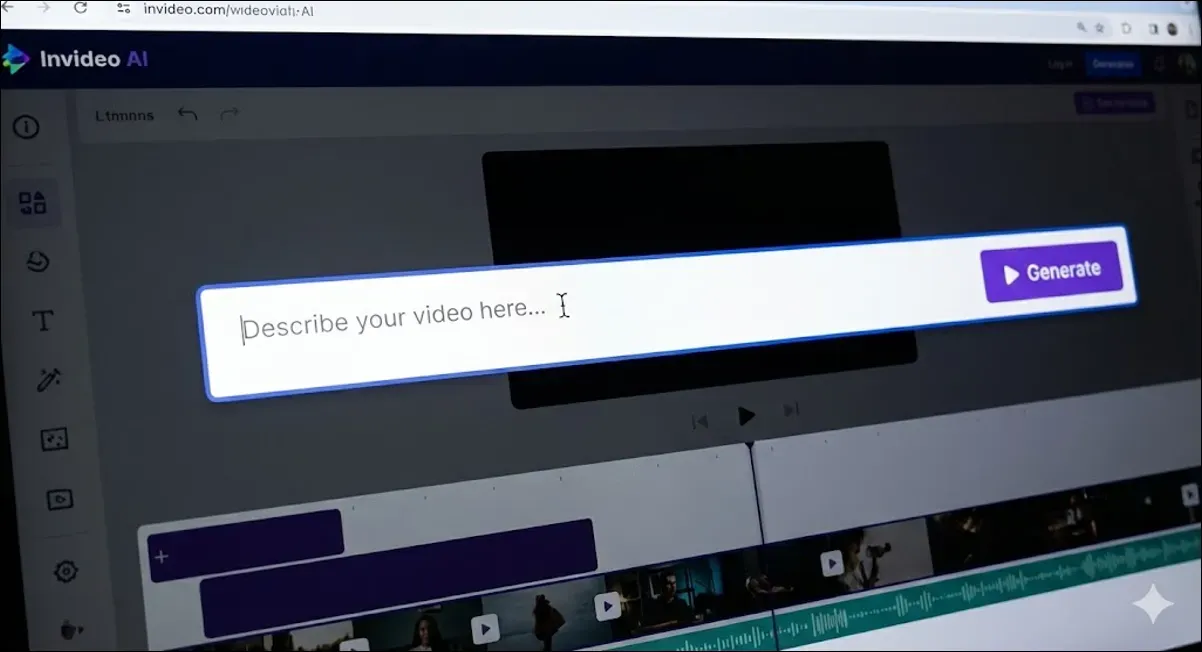
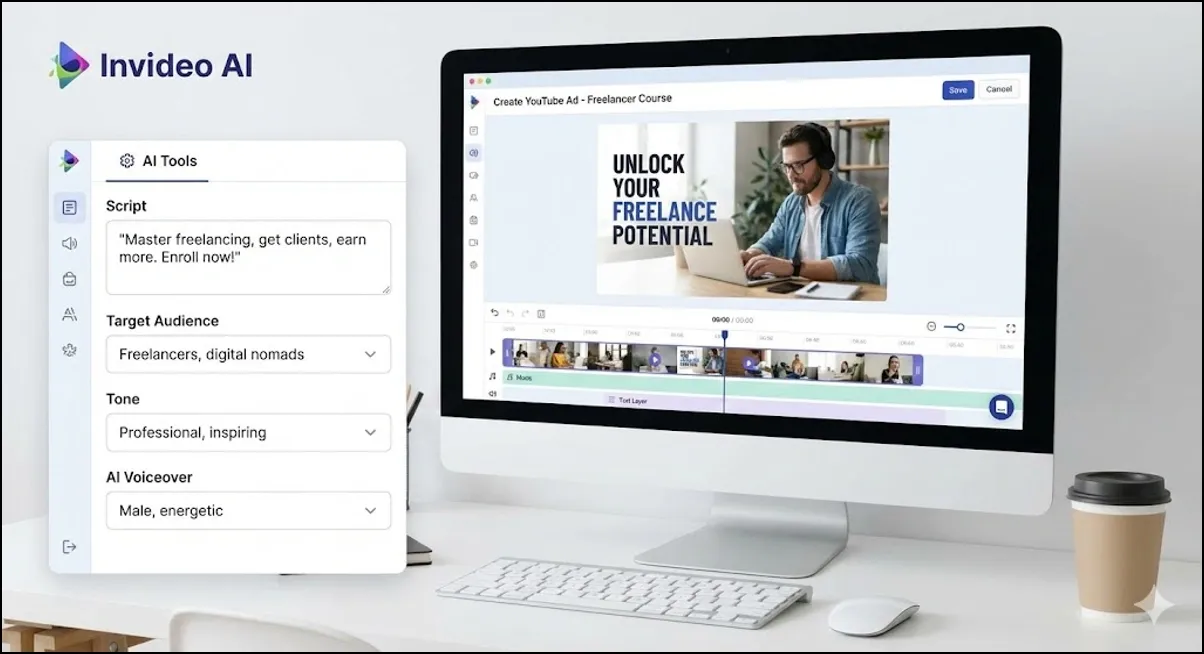
When you get inside InVideo AI, you'll see a prompt box right at the center. This is where the magic begins.
Starting with a Workflow
I’m going to start with a creative concept, something simple like a 3-minute YouTube video about a scientific topic. For this, InVideo has built-in workflows, which are like presets or styles for your videos. Using them makes creating videos much easier. You'll find them by clicking on "Workflows."
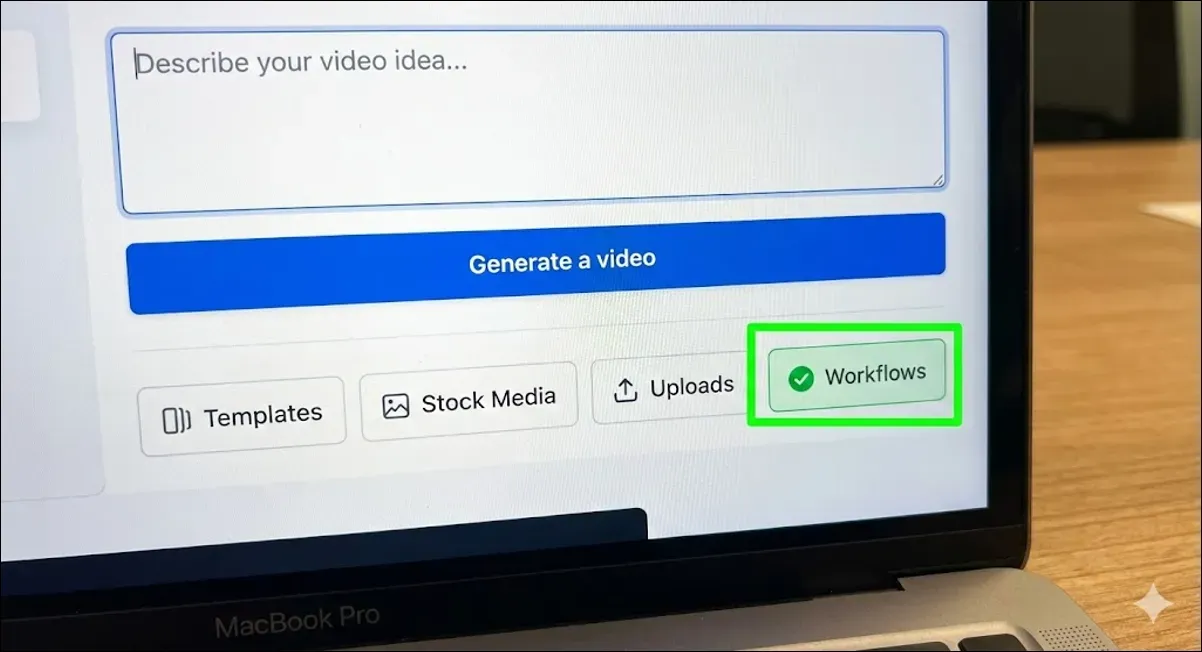
You’ll see tons of options, but for this example, I'll go with the "Educational Video" workflow.
A common mistake I see is people skipping this and trying to write a massive prompt from scratch. Don't do that.
InVideo created these workflows as a guide for the AI's structure, so use them to cut down on troubleshooting time and avoid generic-looking outputs.
Crafting the Perfect Prompt
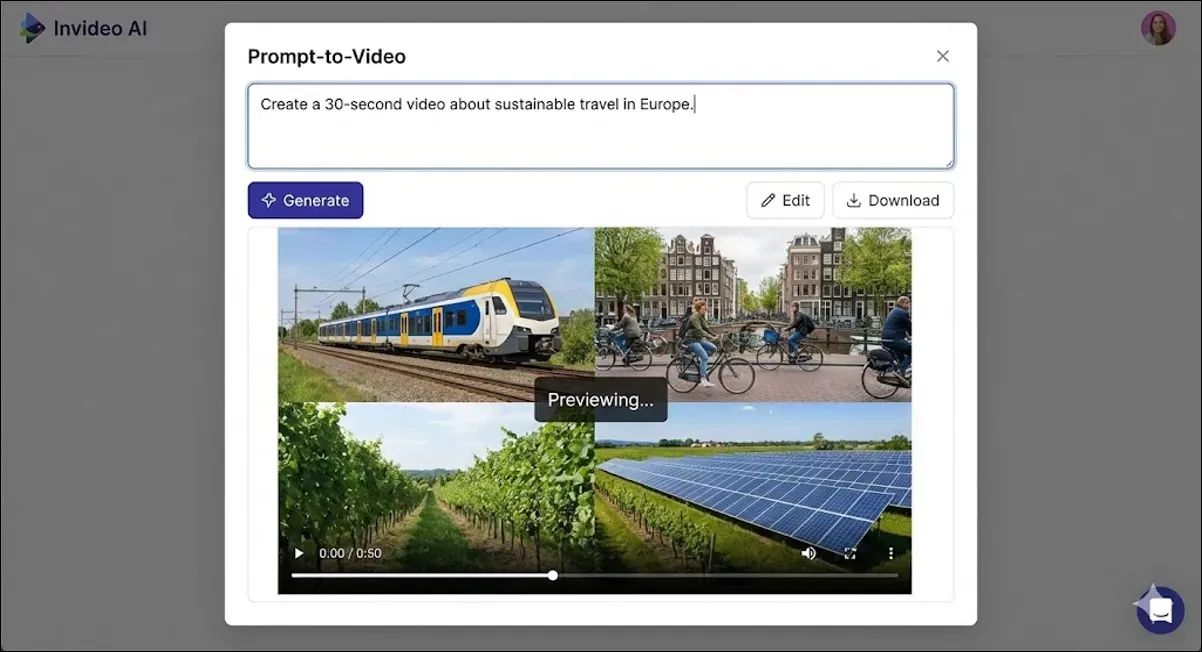
Once we open the workflow, we see a prompt box. I'll type: "Create a 3-minute YouTube video titled 'What is tectonic plates?' use a documentary tone with three short points and a closing line."

I always include a title in the prompt because it helps the AI understand the intent of the video, which dramatically improves its focus and flow. Leaving it out often results in a generic-sounding video.
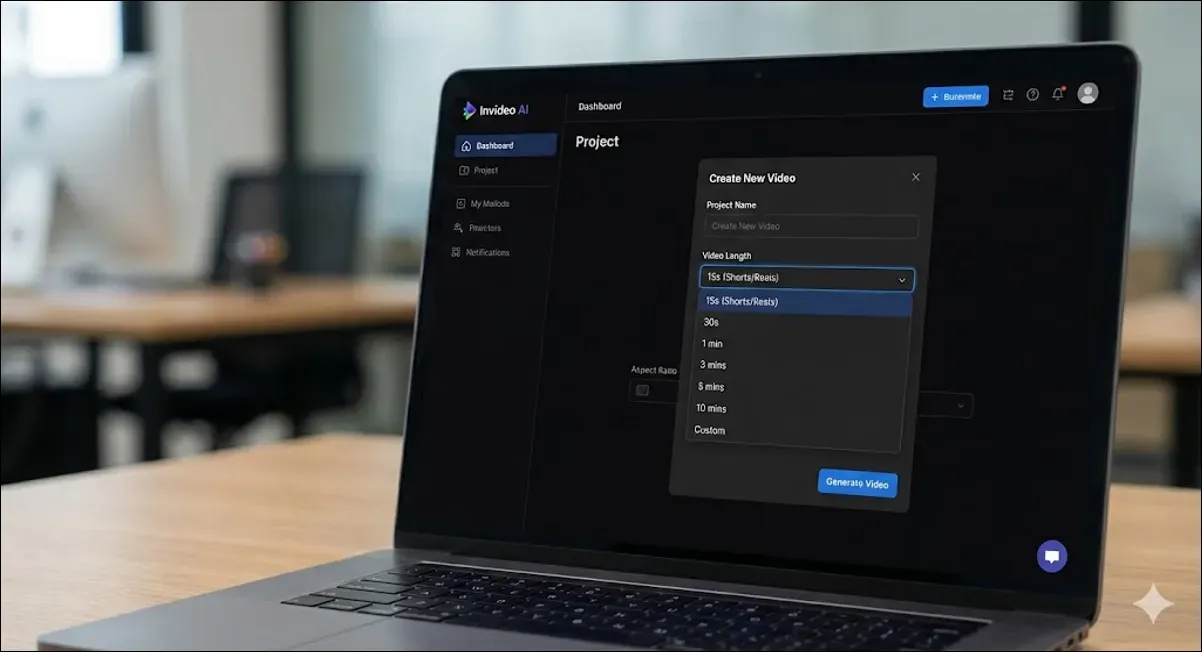
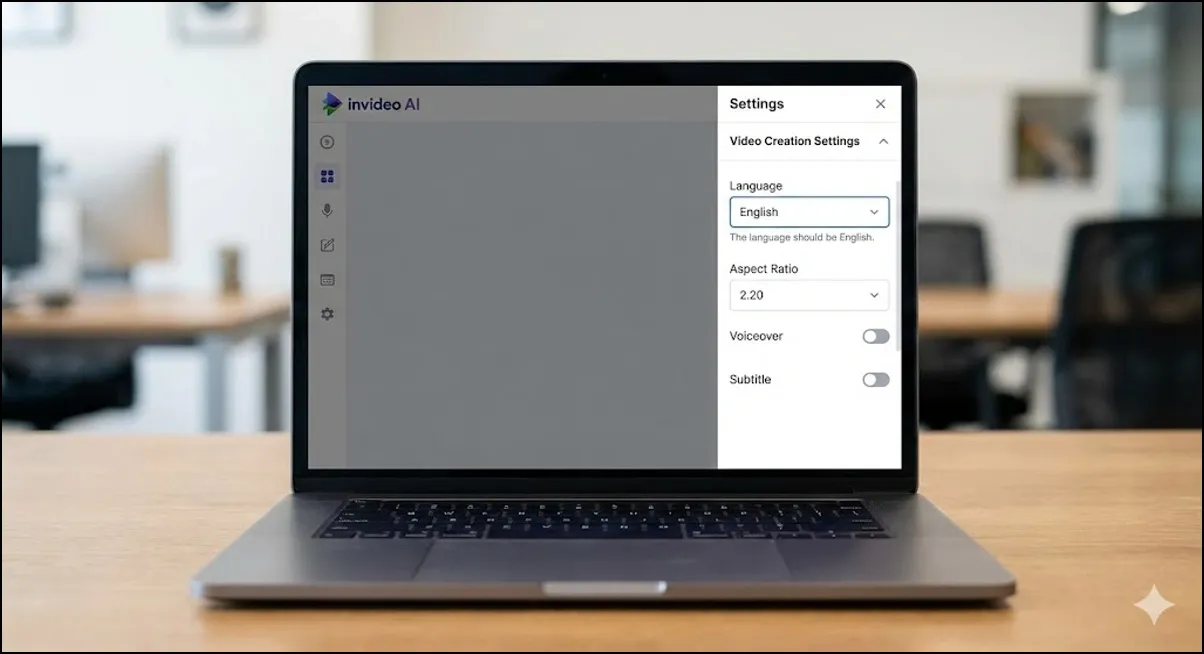
Setting Up Your Video
Now, let's select the length and platform. You can do this at the top. I'm going with three minutes and YouTube.
Next, we can pick our music. I’ll click on the plus sign next to "background music" and type "relax."
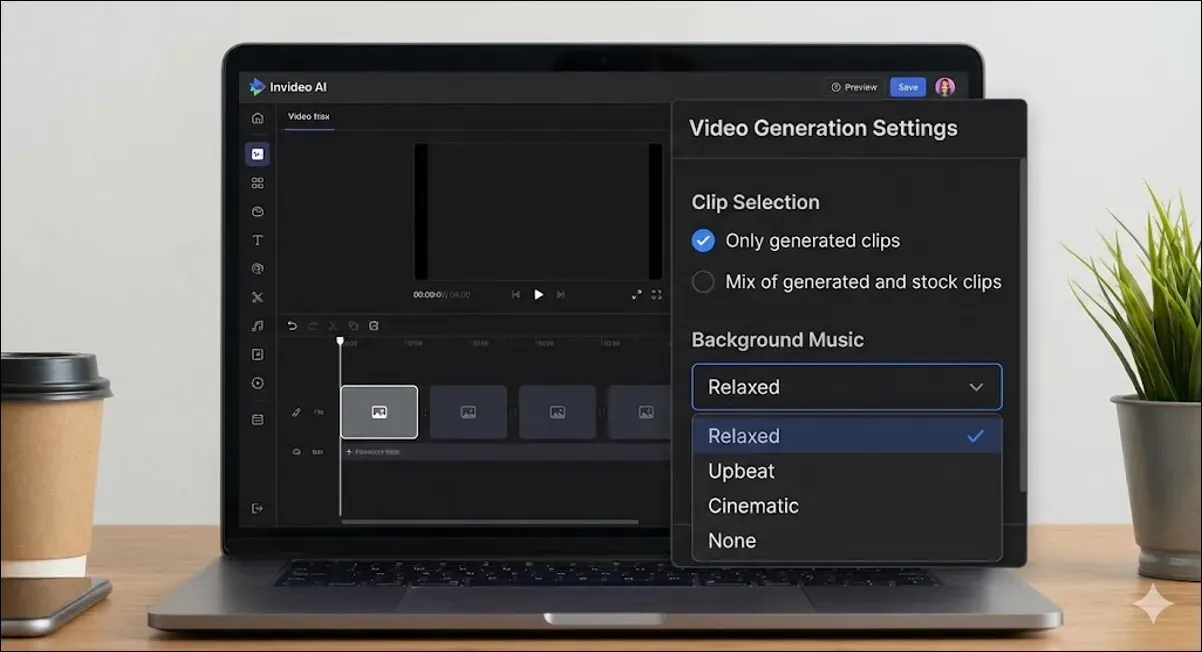
If your music doesn't match the tone of the voice or visuals, it can subconsciously kill the energy of the video. You want the music to reinforce the message, not distract from it.
While we're in the settings, we need to make sure we're using only generated clips. This means we are only using AI-generated videos and not the ones from InVideo's large stock footage gallery.
For the visual style, I'm going with claymation. If your video is educational or abstract, unique visual styles like claymation or 3D can boost retention.
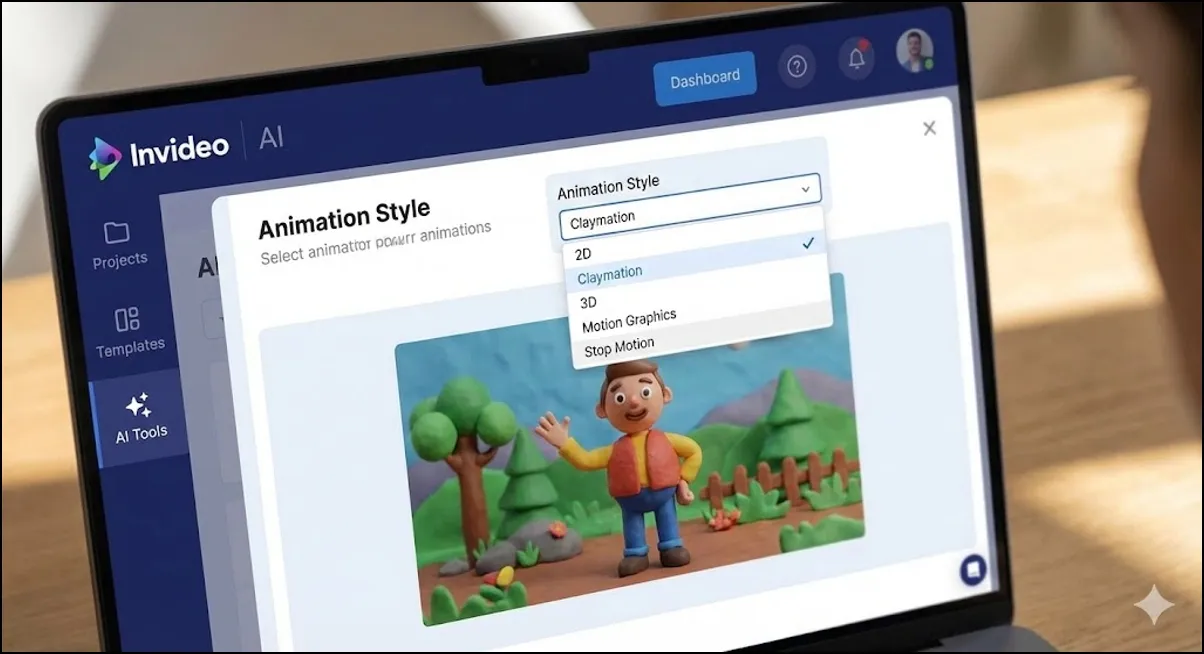
For business videos, however, it's better to stick to realistic or cinematic styles to maintain authority.
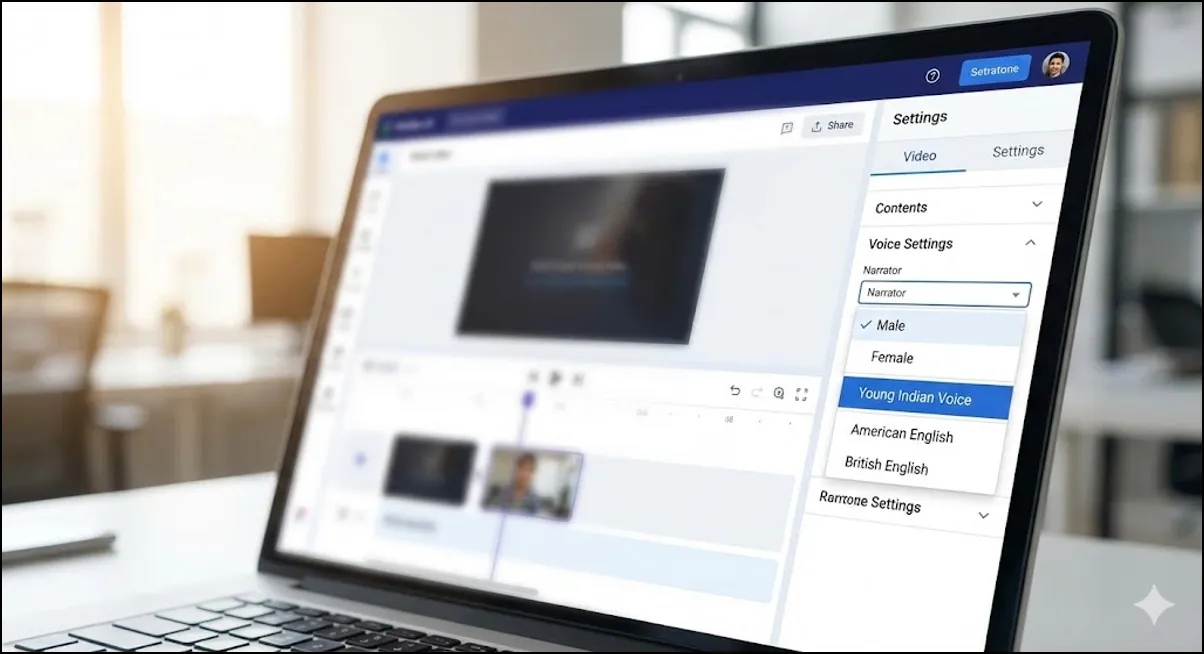
Adding Subtitles and Voice
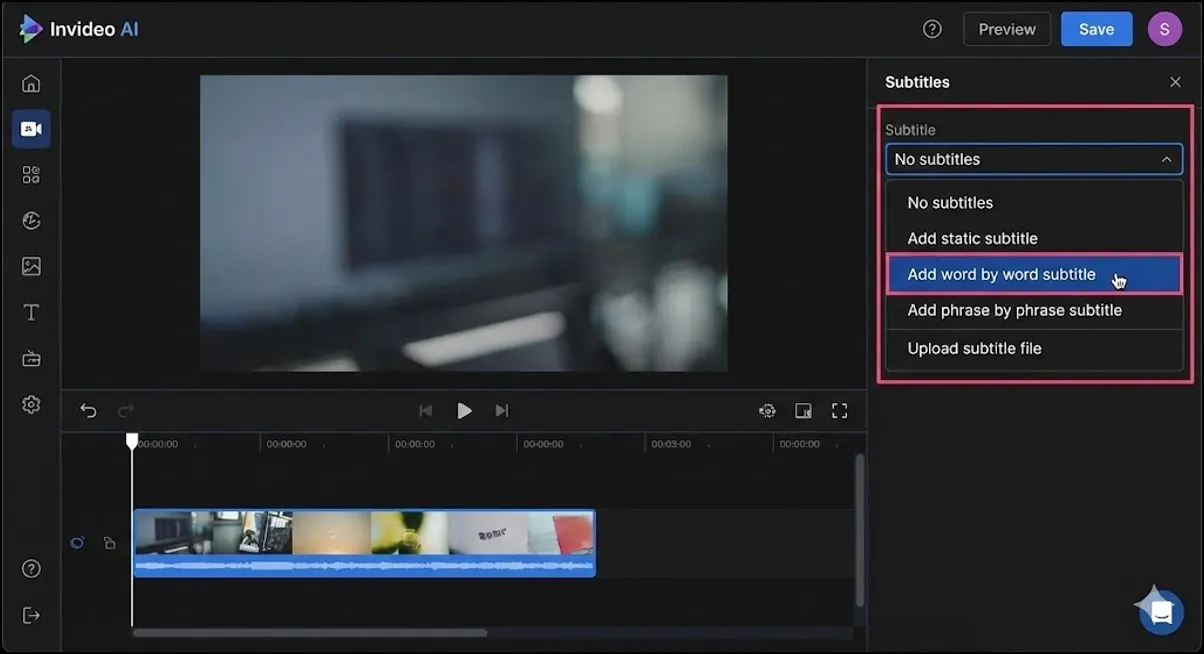
Let's say I also want to include subtitles. I can do that easily and choose the "add word-by-word subtitle style."
For the language, I'll go with English, but you can pick from many other languages.
Finally, we chose a voice actor. Here, you can decide what the AI-generated voice-over will sound like. This feature is incredibly useful because it even allows you to clone your own voice, but I'll get into that later. For now, I'm going for a male with a New York accent.
Now, I'll hit "Continue."
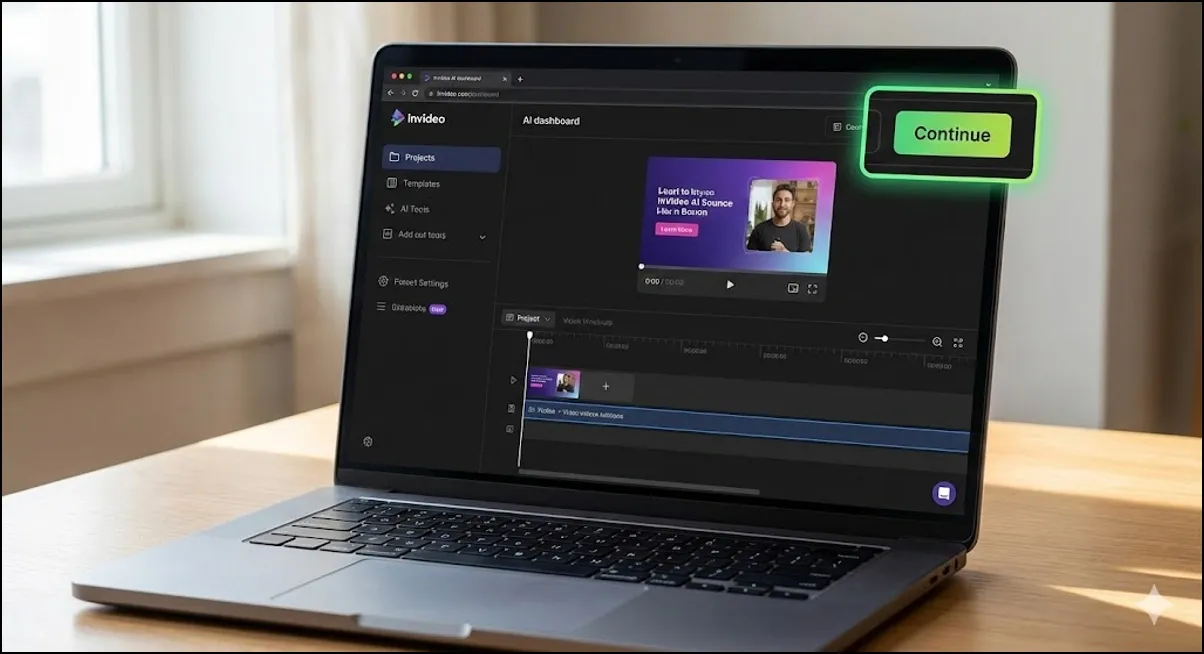
What's happening now is that InVideo is taking that prompt and auto-generating everything—the script, scenes, voice-over, visuals, and music. I'm not uploading anything; the AI handles it all in one go.
Once it's finished, let's take a look at the result.
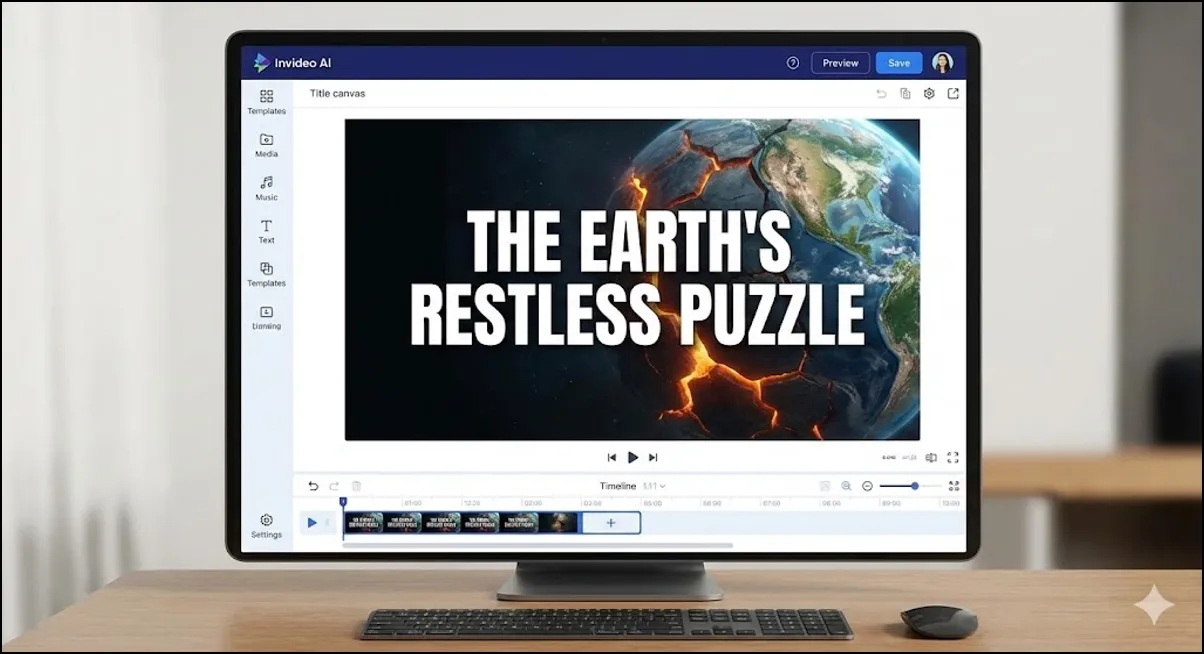
The video came out looking very good. The generation quality is great, and it generated everything based on my input. It's clean, has transitions, and the voice-over is done.
Refining Your Creation
Here's where most people mess up. They generate once, see something decent, and stop. But your first generation is just a foundation. Every great video comes from smart refinement. Let's say I want to change the opening scene.
I can do that by clicking on the edit icon and then in the edit menu, select "media."
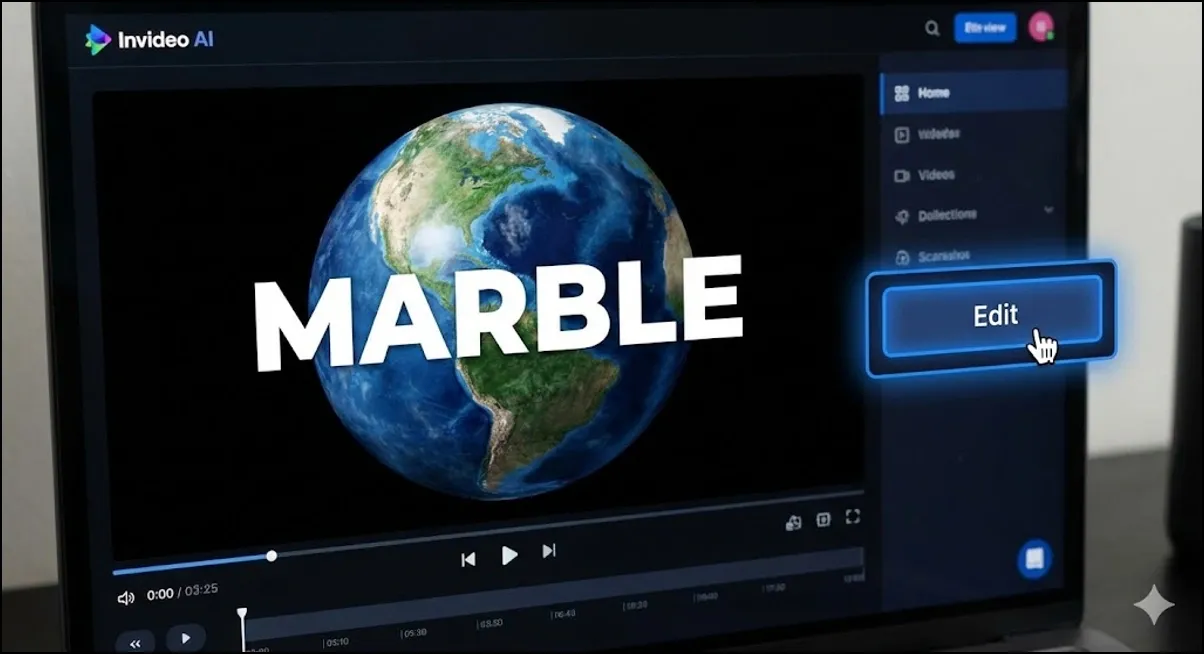
From here, I go to the "generative media" section, where I can edit every single clip.
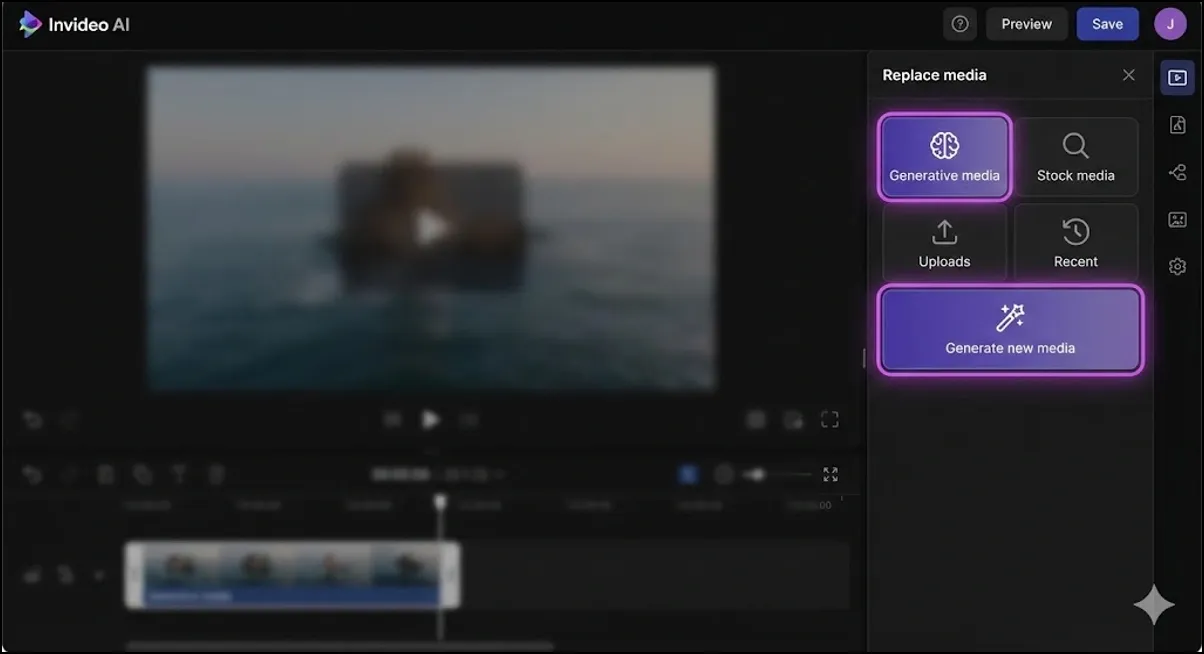
I'll click on the first clip, then "generate new media," and write a new prompt like "clay earth spinning." It generates a new clip to replace the old one.
What if I wanted to create a second version of this video in Spanish? I don't need to start over. I can go to the edit icon again and just type "translate the entire video to Spanish." In a few seconds, the whole thing is translated with updated audio and captions in the same format.
>>Try Invideo AI For Free
How to Create Ads with InVideo AI
InVideo isn't just for creating cool-looking videos for fun. You can use it as your personal production team. Let's create an ad for a random product. Let's say I need to make a brand ad that a business could run on Instagram or YouTube.
We're not talking about flashy brand videos here; simple, clean, and performance-focused videos are the ones that convert the best, and that's what InVideo helps you create.
I'm back on the dashboard, and this time I'm going to use the "short ad video" workflow. Let's go with a simple product: a moisturizer that helps with redness. I click on the workflow and select the time and platform, as well as the pacing. Here's what I'll type: "Instagram video explaining why this moisturizer helps reduce redness."
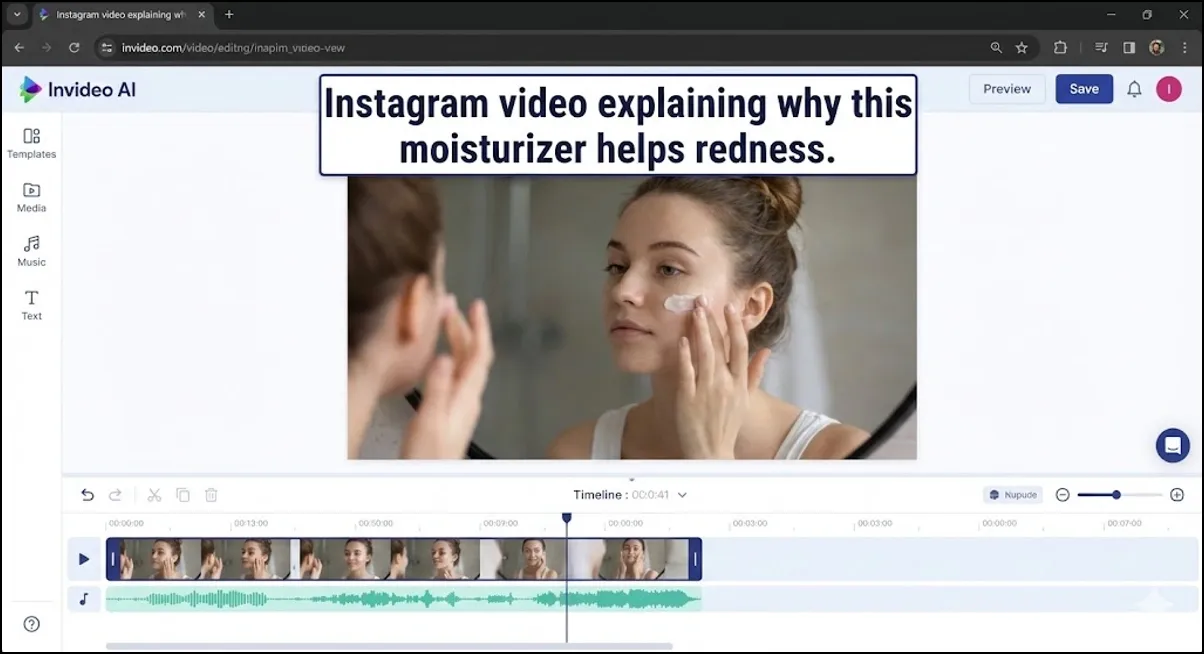
Then, I make sure to select "only generative media" and choose a "hyperrealistic" style. For music, I'll type something light and upbeat like "soft acoustic." Then, I choose a female voice with an American accent and hit "continue."
The result is a vertical video formatted for Instagram. The voice sounds clear, and the pacing works for an ad. But let's say I want to tweak it to fit a more professional brand. I can open the "edit script" and change one line from "say goodbye to redness in seconds" to "clinically tested to reduce redness in 7 days." I click "save changes," and it regenerates just that scene with the new voice-over and visuals.
Creating an Ad for a Digital Product
Let's try a more advanced one: an ad for a digital product. I'm going to build a 60-second YouTube ad for a freelance course. Back to the dashboard, I select the "short ad" workflow.
This time I type: "YouTube ad for a course that helps freelancers land their first $5,000 client. Use a logical progression structure. Include a clear CTA. Use only AI-generated B-roll of people working from laptops, client meetings, and Zoom calls."
When writing prompts for ads, the structure is everything. Make sure to include instructions on the hook, problem, solution, and call to action. If you don't make that clear, the AI might give you a poorly structured script.
Then, I selected YouTube Shorts for the platform, set the time to 60 seconds, chose upbeat music, and a young male British voice. I ensure to include only generated clips before hitting generate.
Once the video is built, I watch the first pass. The structure looks right, and the video quality is very good. If I want to make any adjustments, I can easily do so with the same process as before.
Cost vs. Value
This whole ad took about 20 minutes to create with no timelines, no motion graphics software, and no freelance team needed. Compare that to hiring out: $300 for a voice-over, $400+ for editing, $500+ for ad scripting, and a one to two-week turnaround time. InVideo AI does all of it for $100 a month, compared to a cost of over $1,200 and a two-week wait.
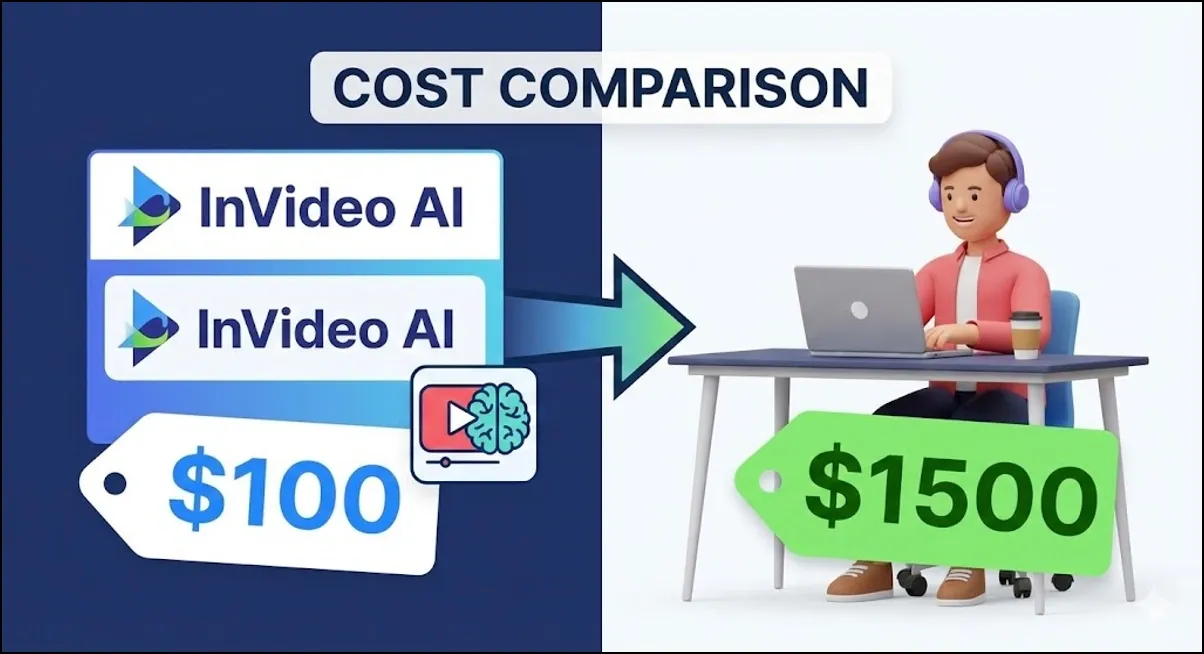
The worst part about hiring out is if I wanted to make this ad in French, I would need to pay the $300 for a voice-over all over again. But with InVideo, I’d just go into the magic box and type "translate the full video into French," and it's done in under five minutes.
This is what makes it a legitimate business tool, not just for solo creators, but for agencies, coaches, brands, and anyone creating content at scale.
Once you're happy with the video, click "Export," choose 1080p, remove the watermark if you're on a paid plan, and that's it. You're ready to publish.
Advanced Features and My Honest Opinion
InVideo AI has a lot of useful and game-changing features. The workflows make prompting less time-consuming, and the editing allows you to change every single part of the video to fit your idea perfectly. The huge stock image library makes it easy to find tons of images for everything from travel videos to coaching ads.
Voice Cloning
One of the coolest features in InVideo is voice cloning. This feature allows you to use your own voice for any narration you need. It's super useful and strengthens your brand voice if you decide to use it. Here’s how to set it up: When you are in the prompt box section, click "plugins" and from the popup menu, select "AI voice clone." From there, you can click "add voice" and drop in your voice recording.
For this to work, make sure to follow all the instructions. I recommend going for a much longer recording than 30 seconds. In my experience, two to three minutes works better, but you can go even longer. Also, try using a tone that matches your content niche. If your brand is calm and educational, speak that way in your sample. The AI mimics your vocal character, so give it the right input.
See if Invideo AI is what you need.
The Reality of AI-Generated Content
Now, for my honest opinion. While InVideo is a decent tool with many cool features, it's not a magic bullet. If you're looking to just plug and play and upload the videos directly, you might have some problems. People are becoming numb to AI content, and purely AI-generated videos often don't perform well on social media. The AI voices can feel off, and the AI struggles with certain visuals, like hands holding objects. The video can lack context, and the AI voice-over can feel pretty bad at times.
That doesn't mean it's useless. It’s a great tool to have in your arsenal. We use it a lot for creating B-roll for our videos. The feature to turn photos into videos is a game-changer. For an ad, I needed a video of a woman putting gum in her mouth. I had InVideo AI create an image of it and then used the photo-to-video feature to bring it to life. It can get a little freaky sometimes, as AI does weird things, but it's still so cool.
If you're going to have any luck with plug-and-play, it will probably be with short-form content. A 7-second weird clip might go viral. But for long-form content, it's a lot harder. You'll likely need to use a different script and a real voice-over. But the video portion of InVideo gives you a lot to work with.
The Free Version vs. Premium
The free version is quite limited. The results can be disappointing, often just a compilation of moving stock pictures with a huge watermark. It also doesn't always follow style references.
The premium version is better; the results are higher quality, there's no watermark, and it listens to your style prompts. However, it can still suffer from some of the same issues, like adding unnecessary details.
Common Glitches and Annoyances
Like any software, especially a relatively new AI tool, InVideo AI has its quirks. Here are a few things that users have reported:
- Freezing and Crashing: Some users have experienced the platform freezing, especially on laptops. One user noted it worked fine on their Xbox browser but not on their computer. Another mentioned a persistent "looks like we hit a bump" error that stops video playback.
- Image Looping: Uploading a JPG can result in it looping every few seconds, making it impossible to create a proper slideshow or use a still image effectively.
- Random Clips: Sometimes, random zero-second video clips appear out of nowhere. The fix seems to be going back to your script and deleting any excess clips.
- Pause Command Issues: The pause command in the script doesn't always work. The workaround is to try shifting the pause slightly, making it longer or shorter, which is a bit of trial and error.
- Settings Reset: Your media settings can randomly reset after you edit something else in the timeline. The only solution is to leave these settings as the very last thing you do before exporting.
- Individual Clip Saving: You have to save the media properties for each clip individually. If you don't, they just won't save. It's a time-waster, but there's no way around it for now.
- Disappearing Uploads: Sometimes, your uploaded videos will randomly disappear. A simple page refresh usually brings them back, but it’s still an inconvenience.
So now you know exactly how to go from an idea to a ready-to-publish video without editing, recording, or wasting thousands on a production team or freelancers. With InVideo, it's all done in one place using just plain text prompts. It's a powerful tool with a lot of potential, but it's important to understand its limitations and be prepared to refine its output to get the best results.